Bella Marcel
  • Home
  • About Me
  • Contact
  • Blog

Block 2: "things are made"

10/28/2020

0 Comments

 
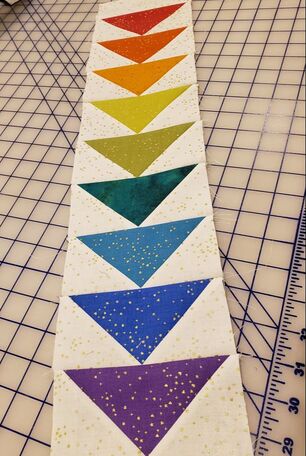
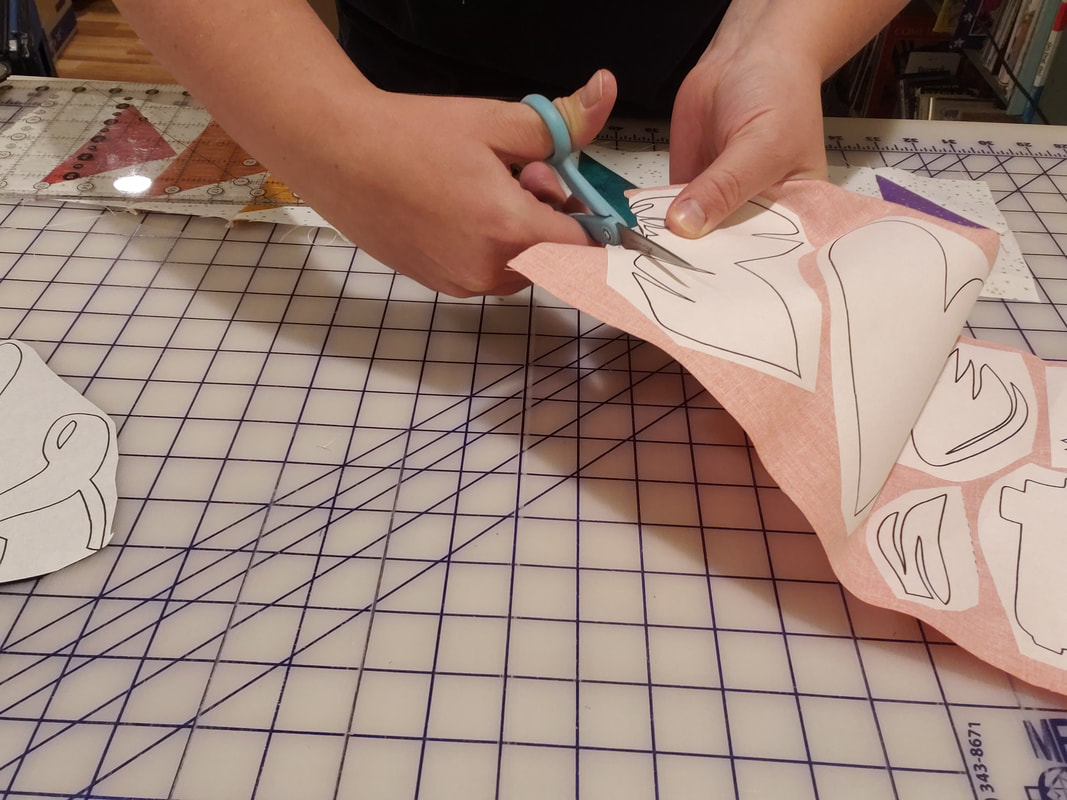
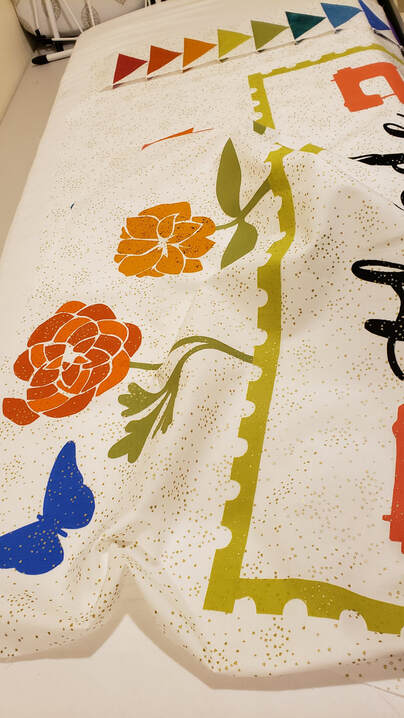
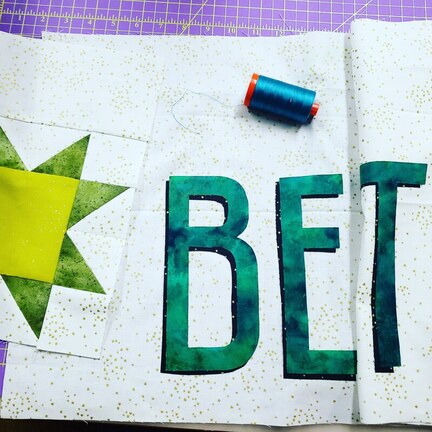
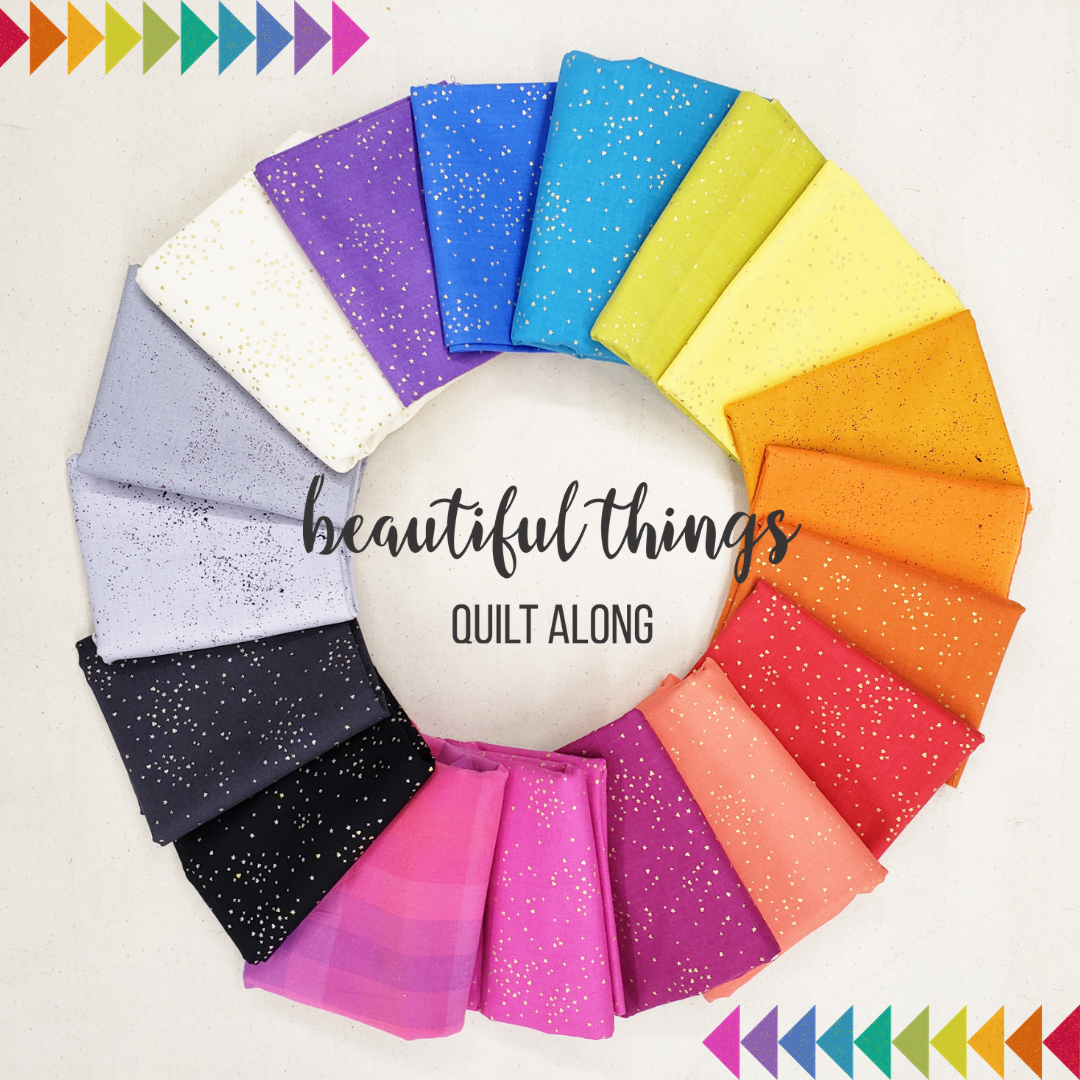
 Welcome back for Block 2 of the Beautiful Things QAL! 

I'm in the middle of a cross-country move as I film and make this block but it's giving me a respite from the never-ending box-packing, junk-sorting, heavy-lifting that has been my last couple of weeks. And I'm excited for the adventures that await! Let's jump straight in. If you have any questions AT ALL, reach out to me via social media, email, or on this blog/YouTube. With a baby in tow and lots of changes going on, my response time is not as fast as it normally is, but I WILL respond to you!

A couple of notes from some feedback I've received:

If you ordered the kit from FlexiFuse, it includes all the laser-cut applique, so you will SKIP all the applique tracing and cutting steps. I'm sorry I didn't mention that to begin with, but I don't have a kit, so you can see why it wasn't a present thought. Haha!

If you ordered the pre-printed fusible templates from FlexiFuse, you will SKIP the applique tracing step and fuse your fabrics straight to the pre-printed fusible. I am using the pre-printed templates (though I do show you how to trace in my Block 1 video).

If you haven't started the quilt along yet, just jump straight into Block 2 so that you're able to finish the block in time to be eligible to win the upcoming giveaways/prizes! Go HERE to download fabric requirements, cutting guides, and all the applique templates if you haven't already!

***IF you're not planning on making the full quilt and would like to stop at this point after Block 2, you can! It'll just read "Beautiful Things are Made. You won't want to trim the bottom of your block off, and you'll add your bottom "stamp" applique pieces and additional sashing with Blizzard Shimmer before quilting/binding it.

Let me know if you have other questions or concerns, but let's dive right in!


Block 1 Giveaway!

First things first, congratulations to @quiltish for her Block 1 finish! She won a FQ bundle of Alison Glass fabrics and a Cutterpillar Flex Light! ANYONE that posts their Block 1 block, message me with your email address and receive a gift card to my favorite quilt shop!
Picture
Picture

Picture

Here's the download link for the Block 2 instructions so you can get started:
Block 2 Instructions - Beautiful Things QAL
File Size: 489 kb
File Type: pdf
Download File

A list of what you need to cut for this block:

Cut (1) 5-1/2" x 3" rectangle from each of the following fabrics:

Apple Shimmer
Mandarin Shimmer
Marigold Spectrastatic
Citron Shimmer
Wasabi Shimmer
Caribbean Shimmer
Peacock Shimmer
Dawn Shimmer
Violet Shimmer


Blizzard Shimmer:
  • Cut (2) 5-1/2" x WOF cuts--
       Subcut into (2) 5-1/2" x 38-1/2" strips and (1) 5-1/2" x 2- 1/2" rectangle
  • Cut (2) 26" x WOF cuts
​      Subcut into (2) 26" x 30" rectangles & use the remainder to cut (18) 3" squares for the flying geese

​For the applique, you'll need to download and print the following templates to size. Click the button below to visit my previous blog post to download the templates.
Download applique templates
Take note that you will not need ALL the applique templates of these colors for this specific block, but it will save fabric and time to trace and fuse all the pieces at a time. I just wait to cut the pieces out until the block that I need them. Watch my YouTube video (link below) where I talk about this.
Watch the block 2 video
Picture
For this block, you'll need the applique templates for:

Mandarin Shimmer
Sunset Spectrastatic
Marigold Spectrastatic
Star Shimmer
Citron Shimmer
Wasabi Shimmer
Peacock Shimmer
Dawn Shimmer
Violet Shimmer
Pink Coral Shimmer
​Noir Shimmer

Follow the Block 1 instructions for assembling your flying geese units with your 5-1/2" x 3" fabric rectangles and 3" Blizzard Shimmer fabric squares. I pressed the seams towards the white to prevent thick seams at the end.

Sew your completed 5" x 2-1/2" flying geese units together with a 1/4" seam in color order: Apple Shimmer, Mandarin Shimmer, Marigold Spectrastatic, Citron Shimmer, Wasabi Shimmer, Caribbean Shimmer, Peacock Shimmer, Dawn Shimmer, Violet Shimmer. 

Then attach your 5-1/2" x 2-1/2" Blizzard Shimmer rectangle to the top end (adjacent to the red flying geese) of the column, which should now measure 5-1/2" x 25." 
Picture
Picture
I pressed my seams toward the end of my rainbow column--it'll lay flatter that way :)

Want to see more in-depth steps on your flying geese units? Watch my video to see a step-by-step and I'll tell you how I chain pieced everything, which makes it go WAY faster :)
Watch block 2 instructional video

Picture
Then cut everything out with microtip scissors. I legit can't feel my fingers still LOL.  This block has LOTS of pieces!

Now for the applique! Trace your reversed templates on to the FlexiFuse and then fuse on to your fabrics with a high heat, no steam. Download the link below for the layout guides for the flowers. It'll be significantly easier to line everything up later if you do!
Block 2 Layout Guides - Beautiful Things QAL
File Size: 410 kb
File Type: pdf
Download File

Picture
These microtip scissors make it relatively simple to cut out these intricate pieces! Woot woot! It still took me several hours just to cut out the applique though. 

​If you're blessed to have picked up a laser-cut kit from FlexiFuse, curse you! Lol. You'll have it much easier than I did!
Picture
Picture
Sew the 26" x 30" fabrics together with a 1/4" seam on the 26" side (the shorter one). Then using a Cutterpillar Glow lightbox, I started laying out my applique. I'd really recommend watching the section of my Block 2 video where I talk about how to center the block because I'll give some helpful tips about lining up all the applique.
Watch Block 2 video
DO NOT fuse pieces 5, 34, 35, or 36, OR the bottom stamp pieces to your block!!! They'll need to be added after you sew other blocks on. Again, watch my video (link above) or read the pattern instructions to learn more.
After you've fused your pieces down (EXCEPT the ones I listed just above), stitch them down with a straight stitch (or if you're ambitious a buttonhold/blanket stitch).

You'll need to square up/trim down your applique block after you've stitched everything down. It needs to measure 25" x 57-1/2." You'll want to trim it off the BOTTOM of the block and mostly off the left side of the block. I talk more about that in my video ;)

After your block is trimmed, sew your column of flying geese to the right hand side of the applique block. 

Then, attach Block 1 to the top, add applique pieces 5, 34, 35, and 36 (and stitch them down). 

Finally, add your 38-1/2" x 5-1/2" Blizzard Shimmer sashing to the left and right hand sides of your Block 1& 2 unit. You're almost halfway done with your quilt!!


Don't forget to post your Block 2 by November 9th, 2020 to be eligible to win the giveaway/prizes! See you in two weeks :)


Picture
0 Comments

Block 1: "Beautiful" Stars

10/13/2020

0 Comments

 
Ok, so apologies are in order first for the delay in posting this first block. With all my good intentions it did not happen on time. If you watched my Instagram Stories earlier today, you'll know my husband's father passed away 2 weeks ago and we are still reeling from that (and in the middle of a move to help out my mother-in-law), my darling, squishy baby boy has been fussy, and to top it all off, my Internet upload/download speeds here at the family cabin have been slower than a dinosaur (you guys, it took me 20 minutes to receive an email!), so PLEASE forgive me for posting this so late. Even with the plethora of valid excuses, I feel enormously guilty, so go easy on me!

You are all so important to me, and I'm trying to keep all my promises that I made months ago despite some of the life changes that are currently happening. This has been a welcome distraction, though, and I am over the top THRILLED to be quilting with you all.

Picture
Picture

​Pre-Quilt Along Giveaway!

First of all: Congratulations to Peggy Pirillo in winning this FQ bundle of Rainbow Shimmer Fabrics (left pic) from Andover! Peggy chose a variety of fabrics from Andover designed by Libs Elliott (see picture below). Anyone who still posts their fabric pull for the quilt along on Instagram or Facebook and tags me @madi_hastings will receive an emailed prize, so make sure to do that!
Picture
Download Fabric Requirements

Cutting Guide
File Size: 33 kb
File Type: pdf
Download File

Fabric Guide
File Size: 280 kb
File Type: pdf
Download File

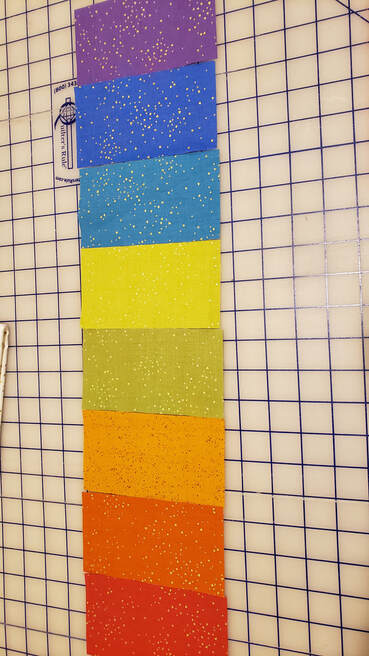
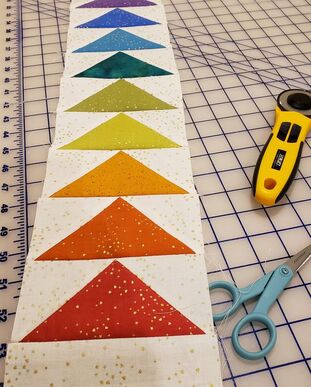
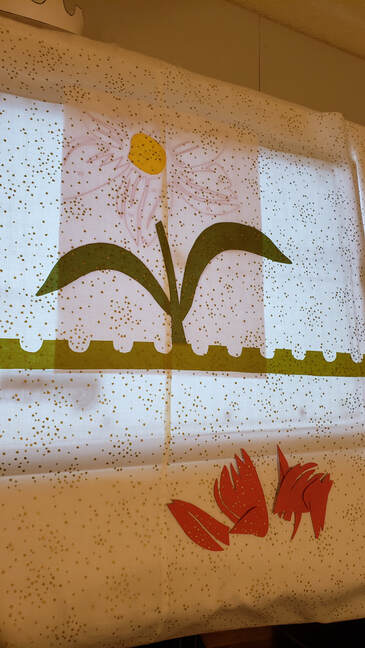
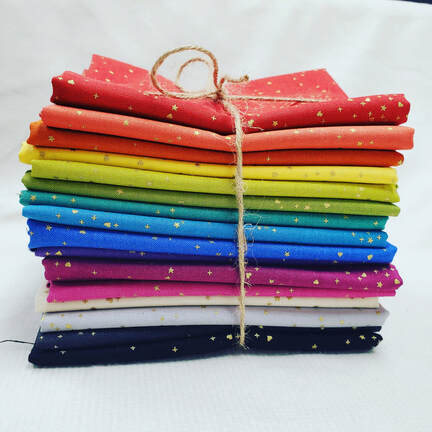
Before we dive into Block 1, please download the Cutting and Fabric Guide (above) that will help as a reference for each block.
Below are ALL of the applique template files (for blocks 1 through 6). They are organized by color. For Block 1, you'll ONLY need some of the "Caribbean Shimmer" file and the "Graphite Shimmer" file.​

Caribbean Shimmer - Applique Templates
File Size: 34 kb
File Type: pdf
Download File

Noir Shimmer- Applique Templates
File Size: 80 kb
File Type: pdf
Download File


Citron Shimmer - Applique Templates
File Size: 40 kb
File Type: pdf
Download File

Peacock Shimmer - Applique Templates
File Size: 25 kb
File Type: pdf
Download File


Dusty Orchid Spectrastatic - Applique Templates
File Size: 17 kb
File Type: pdf
Download File

Pearl Shimmer - Applique Templates
File Size: 31 kb
File Type: pdf
Download File


Graphite Shimmer - Applique Templates
File Size: 29 kb
File Type: pdf
Download File

Pink Coral Shimmer - Applique Templates
File Size: 14 kb
File Type: pdf
Download File


Magenta Shimmer - Applique Templates
File Size: 27 kb
File Type: pdf
Download File

Raspberry Shimmer, Gunmetal Spectrastatic - Applique Templates
File Size: 19 kb
File Type: pdf
Download File


Mandarin Shimmer, Sunset Spectrastatic - Applique Templates
File Size: 14 kb
File Type: pdf
Download File

Star, Dawn, Apple, Moon Shimmer - Applique Templates
File Size: 14 kb
File Type: pdf
Download File


Marigold Spectrastatic, rest of Pink Coral Shimmer - Applique Templates
File Size: 13 kb
File Type: pdf
Download File

Wasabi Shimmer - Applique Templates
File Size: 21 kb
File Type: pdf
Download File

Picture
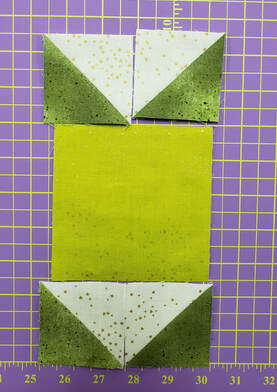
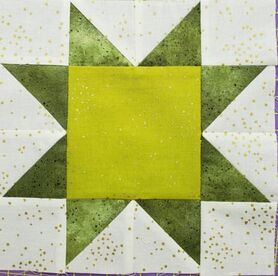
Without further ado...let's get started!

Here is the download link for the Block 1 instructions that you can print off and reference:
Block 1 Instructions - Beautiful Things QAL
File Size: 44 kb
File Type: pdf
Download File

Picture
 A total list of what you'll need to cut:

Blizzard Shimmer:
14 1/2" x WOF (for the applique background)
(2) 10 1/2" x 6" rectangles
(2) 6" x 9" rectangles
(2) 2 1/2" x 8 1/2" strips
(8) 2 1/2" squares
​
Citron Shimmer: (2) 4 1/2" squares

Wasabi Shimmer: (2) 6" x 9" rectangles

Caribbean Shimmer: Applique Templates only

Graphite Shimmer: Applique Templates only
If you'd like, print 2 of my "madi loves HSTs" pages (download link below) to create your HST units. Use a short stitch length and print the file off at 100% to-scale on lightweight paper. If you have your own favorite way of creating half-square triangle units , feel free to digress from my method :) However you choose to make them, your HSTs should be 2" finished (to create an 8" finished star block).
madi loves HSTs
File Size: 64 kb
File Type: pdf
Download File

Picture
Picture
Picture
Make sure to press half your HST units to the white side, and half to the green side. That way, they nest nicely when you stitch them together :) 

​Assemble your rows of HSTs and 2 1/2" squares (as shown to the right). Sew with a 1/4" seam. Press your seams out. 
Picture


Ignore the fact that I was obviously having a mom brain moment when taking the picture to the left :D Your finished star block should look like the one on the right, and measure 8 1/2" unfinished.

​Add your white strips to the sides and the 10 1/2" x 6" rectangles to the tops of the star blocks.
Picture
For the applique bit, make sure your WOF cut is squared up and at least 14 1/2 x 43." 

I traced my templates on FlexiFuse (and used some of the FlexiFuse pre-printed templates (AMAZING!)), ironed them in place on high heat with no steam for 10 to 20 seconds, and then cut them out with regular scissors.

In future blocks, you'll want detail scissors for things like the butterfly cutouts, etc. 

I found that 5" of white space on either side of the block was perfect and then I evenly spaced my applique pieces and placed my pieces 1 1/2" from the bottom of the block. 

The Graphite Shimmer lettering "shadows" underneath the Caribbean Shimmer lettering, so I offset mine by 1/8" to 1/4," just by eye.

I didn't want to disturb my perfectly placed pieces, so I slipped this Cutterpillar tempered glass top under my project, right on top of my cutting mat, and it worked wonders! It did take a little longer to fuse in place because the glass absorbs some of the heat. But I checked my cutting mat and it didn't get hot underneath!
I stitched my applique in place with a blanket stitch. I also love using a straight stitch 1/16" away from the edge of the piece. DON'T FORGET to trim your WOF piece after you're done with the applique. Stitching the applique will cause it to shrink a little so measure twice, and cut once ;) 

Your background piece will need to be cut down to 14" x 42 1/2." Ensure that you trim from the top and equally on the sides, if need be, and that as you trim, it's square with your applique lettering.
Finally, I added my star blocks to the side of the applique block. ​
Picture
Picture
Picture

I WILL have the video link later today...it will be posted shortly. I had to finish editing it somewhere where I actually have decent wi-fi! You'll be able to find the link here, and I'll send out an email update as soon as it's ready.

Thanks for following along...and don't forget you have until Monday, October 26th to finish your block and post it on IG or FB to enter to win the next GIVEAWAY! Don't forget to tag me @madi_hastings so I know you posted.

Annnnd I'll be sending out guaranteed prizes via email for every single person that posts their block. Show me all the quilty goodness!

Thank you all for your goodness, patience, and love. It means a lot!
0 Comments

Pre-QAL Giveaway -- Don't forget to post your fabric pull!

10/12/2020

0 Comments

 
Picture
Want to earn a pre-Quilt Along prize and qualify to enter the pre-QAL giveaway (a FQ bundle of Andover Fabrics)?! 

Post your fabric pull for the Beautiful Things QAL on Instagram (see the fabric requirements in my previous post) Make sure to use the following tags in your post so that I can see you posted! (Feel free to copy and paste these)

@madi_hastings
#madihastings
#andoverfabrics
#flexifuse
​#beautifulthingsQAL

Once you've posted, you're automatically entered! 

Block 1 of the Quilt Along will drop tomorrow afternoon on my blog and a video tutorial on my YouTube channel.

Click the social icon buttons to the left to ensure you're following so you don't miss anything!

0 Comments

    Author

    Hi! I'm Madi Hastings, quilt pattern and surface designer! My obsessions are many, including cooking, plant science, and books, but I'll try to narrow down my geeky-ness to pattern design and quilting for the purpose of this blog! If you'd like to make a suggestion or collaborate professionally, just send me an email at madi@madihastings.com 

    xoxo--
    madi 

    Archives

    January 2021
    December 2020
    November 2020
    October 2020
    September 2020
    August 2020

    Categories

    All

    RSS Feed

Powered by Create your own unique website with customizable templates.
  • Home
  • About Me
  • Contact
  • Blog