Bella Marcel
  • Home
  • About Me
  • Contact
  • Blog

Block 4: "Stitch"

11/17/2020

0 Comments

 
Picture
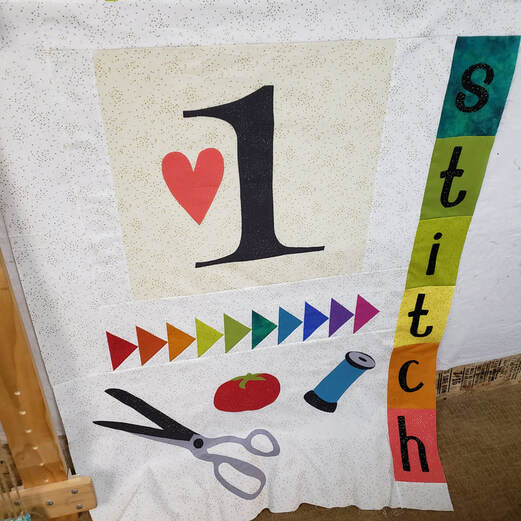
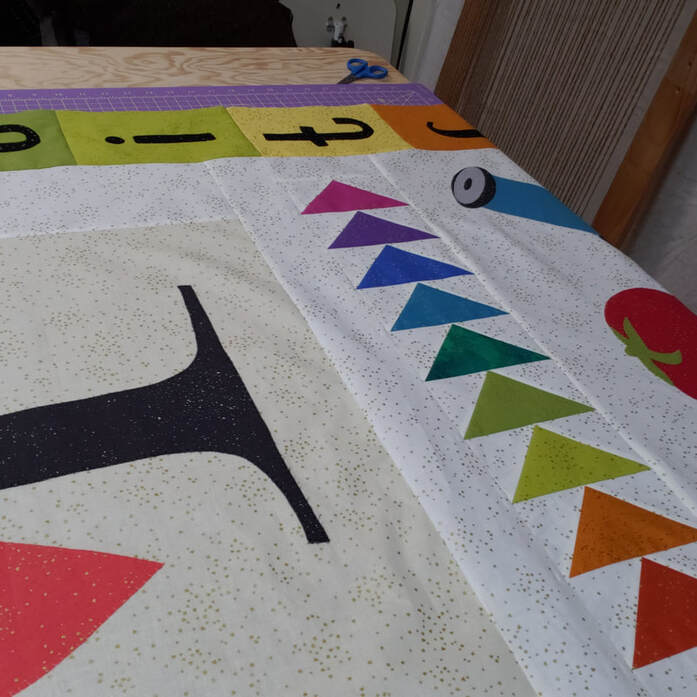
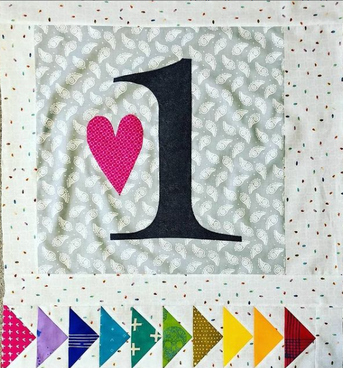
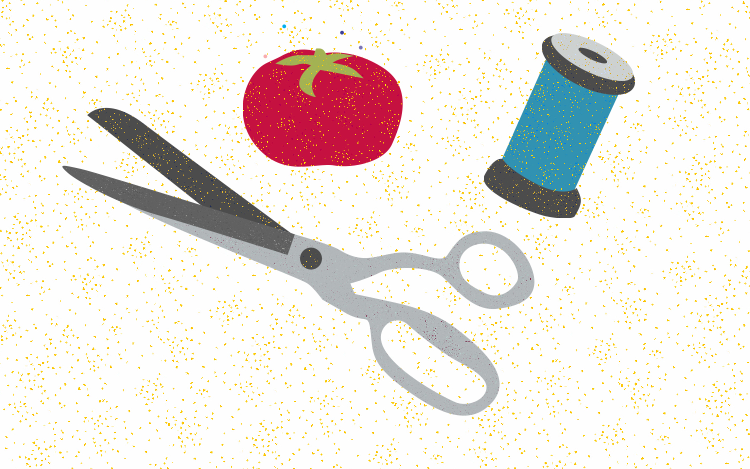
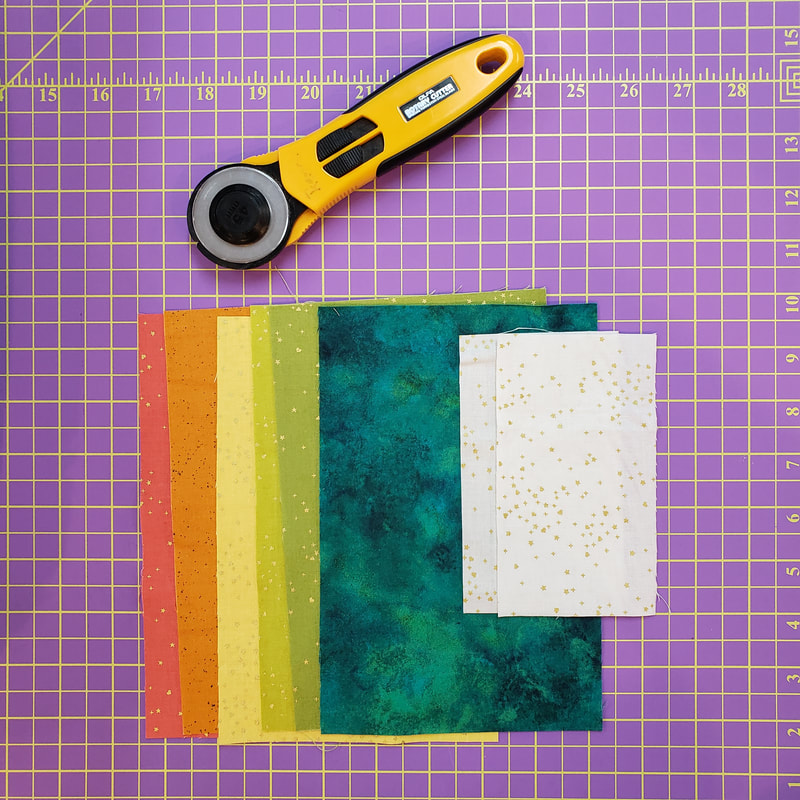
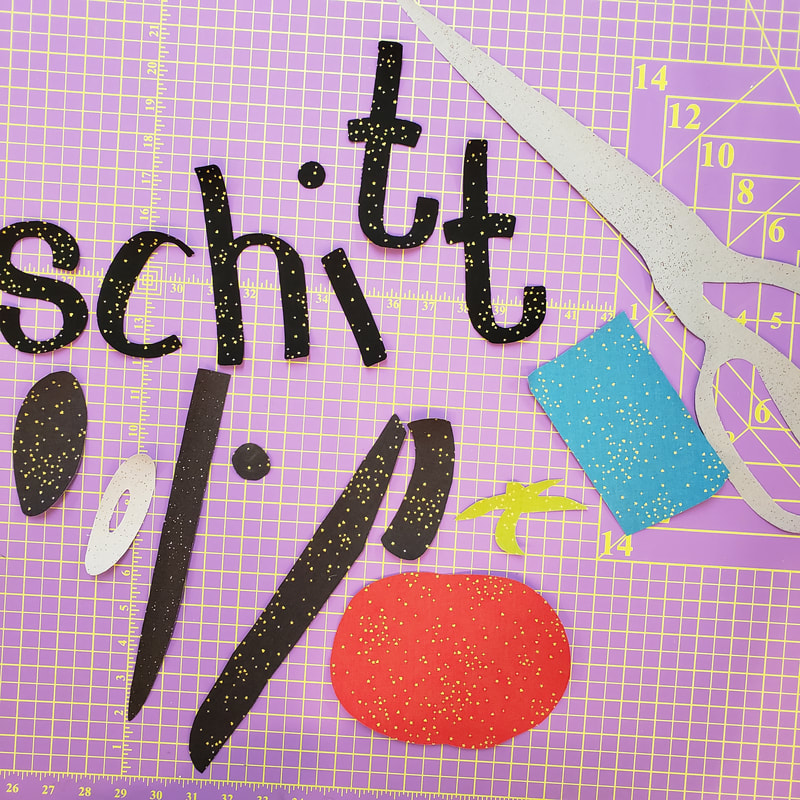
I'm slowly getting things organized in the new place. You can bet I had my sewing room set up before I even put all the clothes away. LOL. Priorities, am I right!?

Getting the new sewing room set up got me all antsy to dive into unfinished quilts, but I'm attempting to stay on-track with seeing this one through before I get entirely sidetracked! The ADD is real, people. Once I go down that rabbit hole of pulling out a secondary project, it all goes downhill! Haha.

Anyway, on to Block 4! I love all the quilty notions on this block and the whimsical "STITCH" text that runs vertically down the block.

If you're just joining the quilt along, just start on Block 4 with us this week (you'll still need to download some of the files from my blog post that covers Block 1) so that you can be eligible to win the upcoming giveaway/prizes! Previous winners of other blocks have won FQ bundles and notions, and EVERYONE participating has received a prize for that week (whether they met the deadline or not!)

What you need to do to be eligible to win the giveaway:

*Finish Block 4 by December 7th, 2020
*Post your finished block to Instagram and tag me @madi_hastings so that I can see that you finished! (If you're unfamiliar with posting to Instagram, you can also email me at madi@madihastings.com to submit your block).
*Use hashtags: #flexifuse #madihastings #beautifulthingsQAL #andoverfabrics #aurifil

​Without further ado, let's get started!


Block 3 Giveaway!

Here's the giveaway for those who finished the last block...Congratulations to @quiltish , winner of 4 large spools of Aurifil threads and a $25 gift card to Keystone Modern Creative! 

Anyone who posts their Block 3 to Instagram is still eligible to receive a free PDF pattern (the mermaid twin-size quilt to the right!), so don't hesitate to post and tag me even if you've already missed this week's giveaway. And once you've posted, message me with your email address so that I can send the PDF pattern your way!
Picture
Picture

Picture
Picture
​Refer to your cutting guide before making any width of fabric cuts!! You need to make sure you're not cutting into the fabric reserved for your applique and vice versa.

Blizzard Shimmer:
  • Cut (1) 33" x 1/2 WOF piece (this will be the background for your applique notions section)
  • Cut (2) 5-1/4" x 3" rectangles from your leftovers from previous blocks

Cut (1) 5-1/4" x 8" rectangle from each of the following fabrics:

Caribbean Shimmer
Wasabi Shimmer
Citron Shimmer
Star Shimmer
Marigold Spectrastatic
Pink Coral Shimmer


Piecing Instructions

Start with (1) of the 5-1/4" x 3" Blizzard Shimmer rectangles, and attach with a 1/4" seam (on the 5-1/4" sides) each of the 5-1/4" x 8" rectangles in color order: Caribbean Shimmer, Wasabi Shimmer, Citron Shimmer, Star Shimmer, Marigold Spectrastatic, and Pink Coral Shimmer. Then, attach the other (1) of the 5-1/4" x 3" Blizzard Shimmer rectangles to the end with a 1/4" seam. Refer to the pattern color image for a visual image.

Cutting Instructions

Here's the download link for the Block 4 instructions so  you can get started:
block_4_instructions_-_beautiful_things_qal.pdf
File Size: 121 kb
File Type: pdf
Download File

Picture
​You'll need the applique templates for:
Apple Shimmer
Wasabi Shimmer
Graphite Shimmer
Noir Shimmer
Peacock Shimmer
Gunmetal Spectrastatic
Dusty Orchid Spectrastatic


Remember that you won't be using ALL the templates at once, since they're sorted by color and not by block. To get an easy rundown of exactly which templates/applique pieces you'll need, I cover that in my Block 4 video.
watch block 4 video

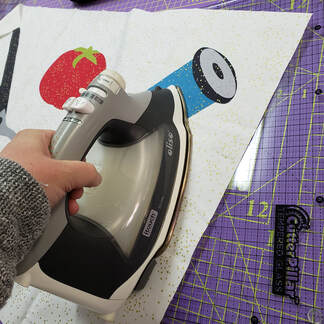
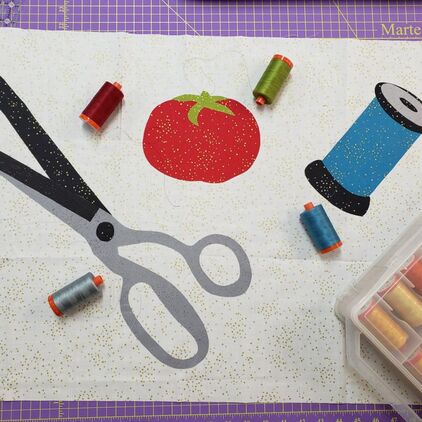
Assembly Instructions

I followed the basic applique process using the reversed applique templates (I have the pre-printed templates from FlexiFuse). I adhered the FlexiFuse to the corresponding fabrics and cut each template out.

Pardon my French ;) I didn't actually plan on putting the templates in a particular order that would phonetically spell a popular swear word (in the image to the right), but there it is. LOL.

Then I ironed the "Stitch" lettering pieces to the center of each color rectangle with the "s" adhered to the Caribbean Shimmer rectangle, and the "h" adhered to the Pink Coral Shimmer rectangle. Remember-- no steam, and high temp settings for 10 to 15 seconds :) If you're using the Cutterpillar tempered glass top, you'll need to iron for longer (watch my Block 4 video to see other important tips for use).

I used a buttonhole/blanket stitch in matching black Aurifil 50 wt thread to stitch each letter down.
Picture
Picture
Picture
Then, I followed the same process for the applique notions block, stitching the applique down with matching Aurifil thread.

Here's the color #s I used when color matching the applique (Aurifil 50 wt): 

2692 (black)
2610 (light gray)
5016 (green)
1103 (maroon)
2815 (blue)

If you purchased FlexiFuse's laser-cut kit, you have the full-size printed layout guides that you can use in conjunction with a lightbox to perfectly place your pieces. If you're not one of the lucky ones, watch my YouTube video of Block 4 to see me place the pieces and get a few pointers.

After your applique is placed, ironed, and stitched down, you'll want to trim your scissors applique block down to 32-1/2" x 20-1/2," making sure it's centered. ​ 
Attach the scissors applique block to Block 3 with a 1/4" seam. Then, attach your "stitch" lettering unit to the right hand size of the Block 3&4 unit. If you want to, add embroidery stitching/beading of pins in the pincushion and embroidery stitch "loose thread" on the spool.

​That's a wrap! Post your blocks by midnight, December 7th, 2020 so you can enter the GIVEAWAY! Woot woot!
Picture

0 Comments

Your comment will be posted after it is approved.


Leave a Reply.

    Author

    Hi! I'm Madi Hastings, quilt pattern and surface designer! My obsessions are many, including cooking, plant science, and books, but I'll try to narrow down my geeky-ness to pattern design and quilting for the purpose of this blog! If you'd like to make a suggestion or collaborate professionally, just send me an email at madi@madihastings.com 

    xoxo--
    madi 

    Archives

    January 2021
    December 2020
    November 2020
    October 2020
    September 2020
    August 2020

    Categories

    All

    RSS Feed

Powered by Create your own unique website with customizable templates.
  • Home
  • About Me
  • Contact
  • Blog